This article explains how to create custom roles and choose the permissions that control what each team member can see and do in Verif.
TABLE OF CONTENTS
- Review permission categories
- Review what each permission allows
- Create a role
- Set or modify a role's permissions
Not every team member needs the same level of access. Access in Verif is controlled through roles, and each role is made up of individual permissions. Admins can combine permissions to build roles suited to each member's responsibilities, from full administrative access to a restricted role for external collaborators.
Review permission categories
Permissions are grouped into categories. Each category controls who can manage:
- User management: account access, team members, and roles.
- Packages: preset bundles of verifications your team can send.
- Verification requests: checks sent through the platform and their results.
- Developer menu: API keys and technical integrations.
- Team: account-wide settings, including preferences, document types, reference question bundles, and payment methods (Wallet).
Review what each permission allows
Each category contains some or all of the following permissions:
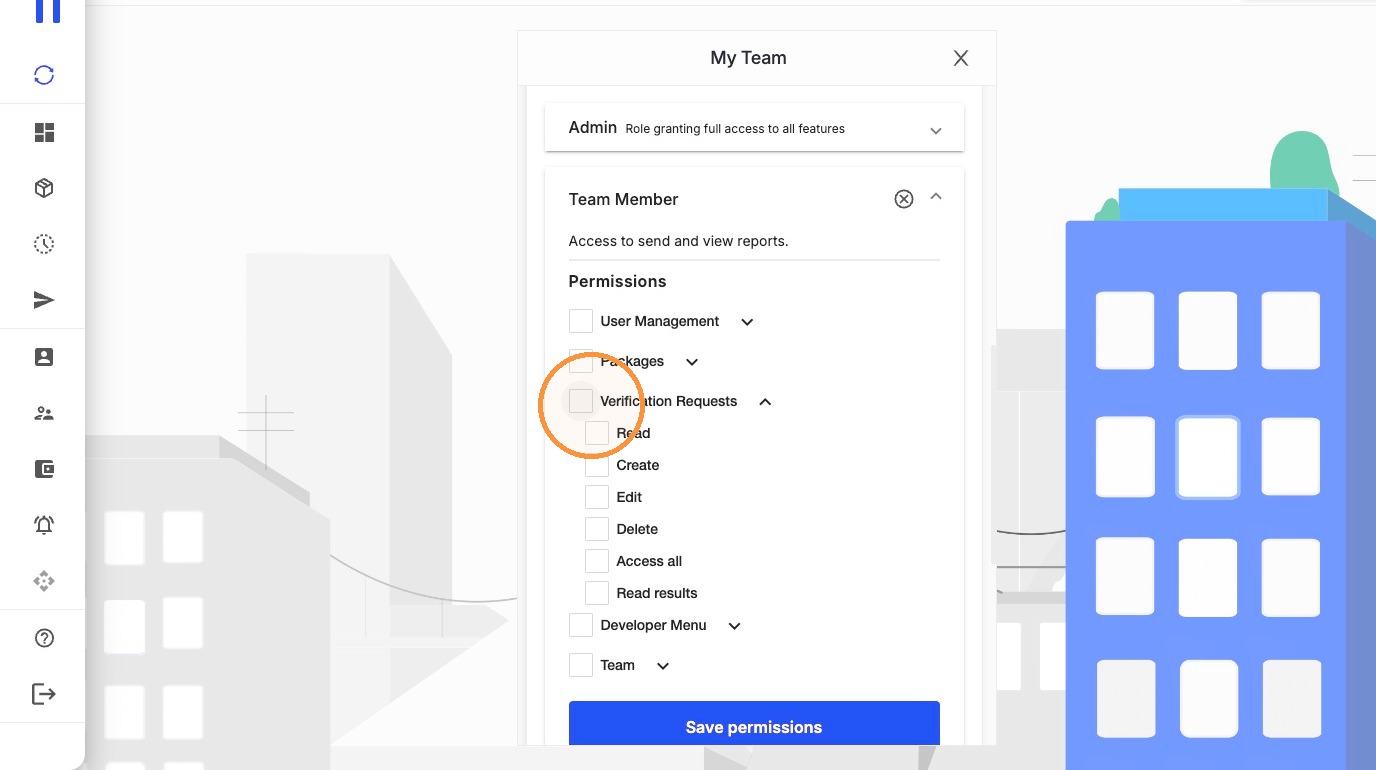
- Read: view existing items and their status, without making changes.
- Create: add new items, such as a package, role, or verification request.
- Edit: change existing items, such as a user's details or a role's permissions.
- Delete: permanently remove items. This cannot be undone.
- Access all: view verification requests from every team member, not only the member's own.
- Read results: view the outcome of completed verification requests.
- Invite: invite new people to join the account.
Create a role
Follow these steps to all a new role to your account.
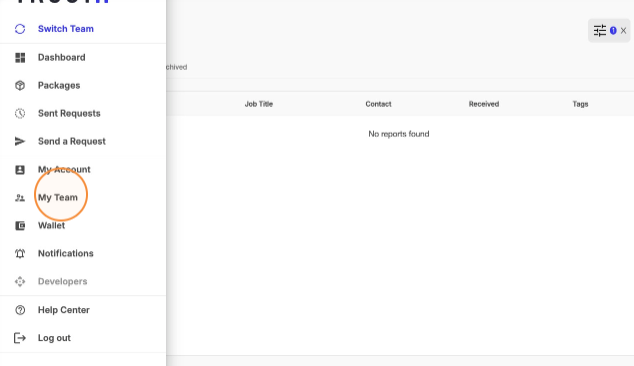
1. From the left-hand menu, click My Team.
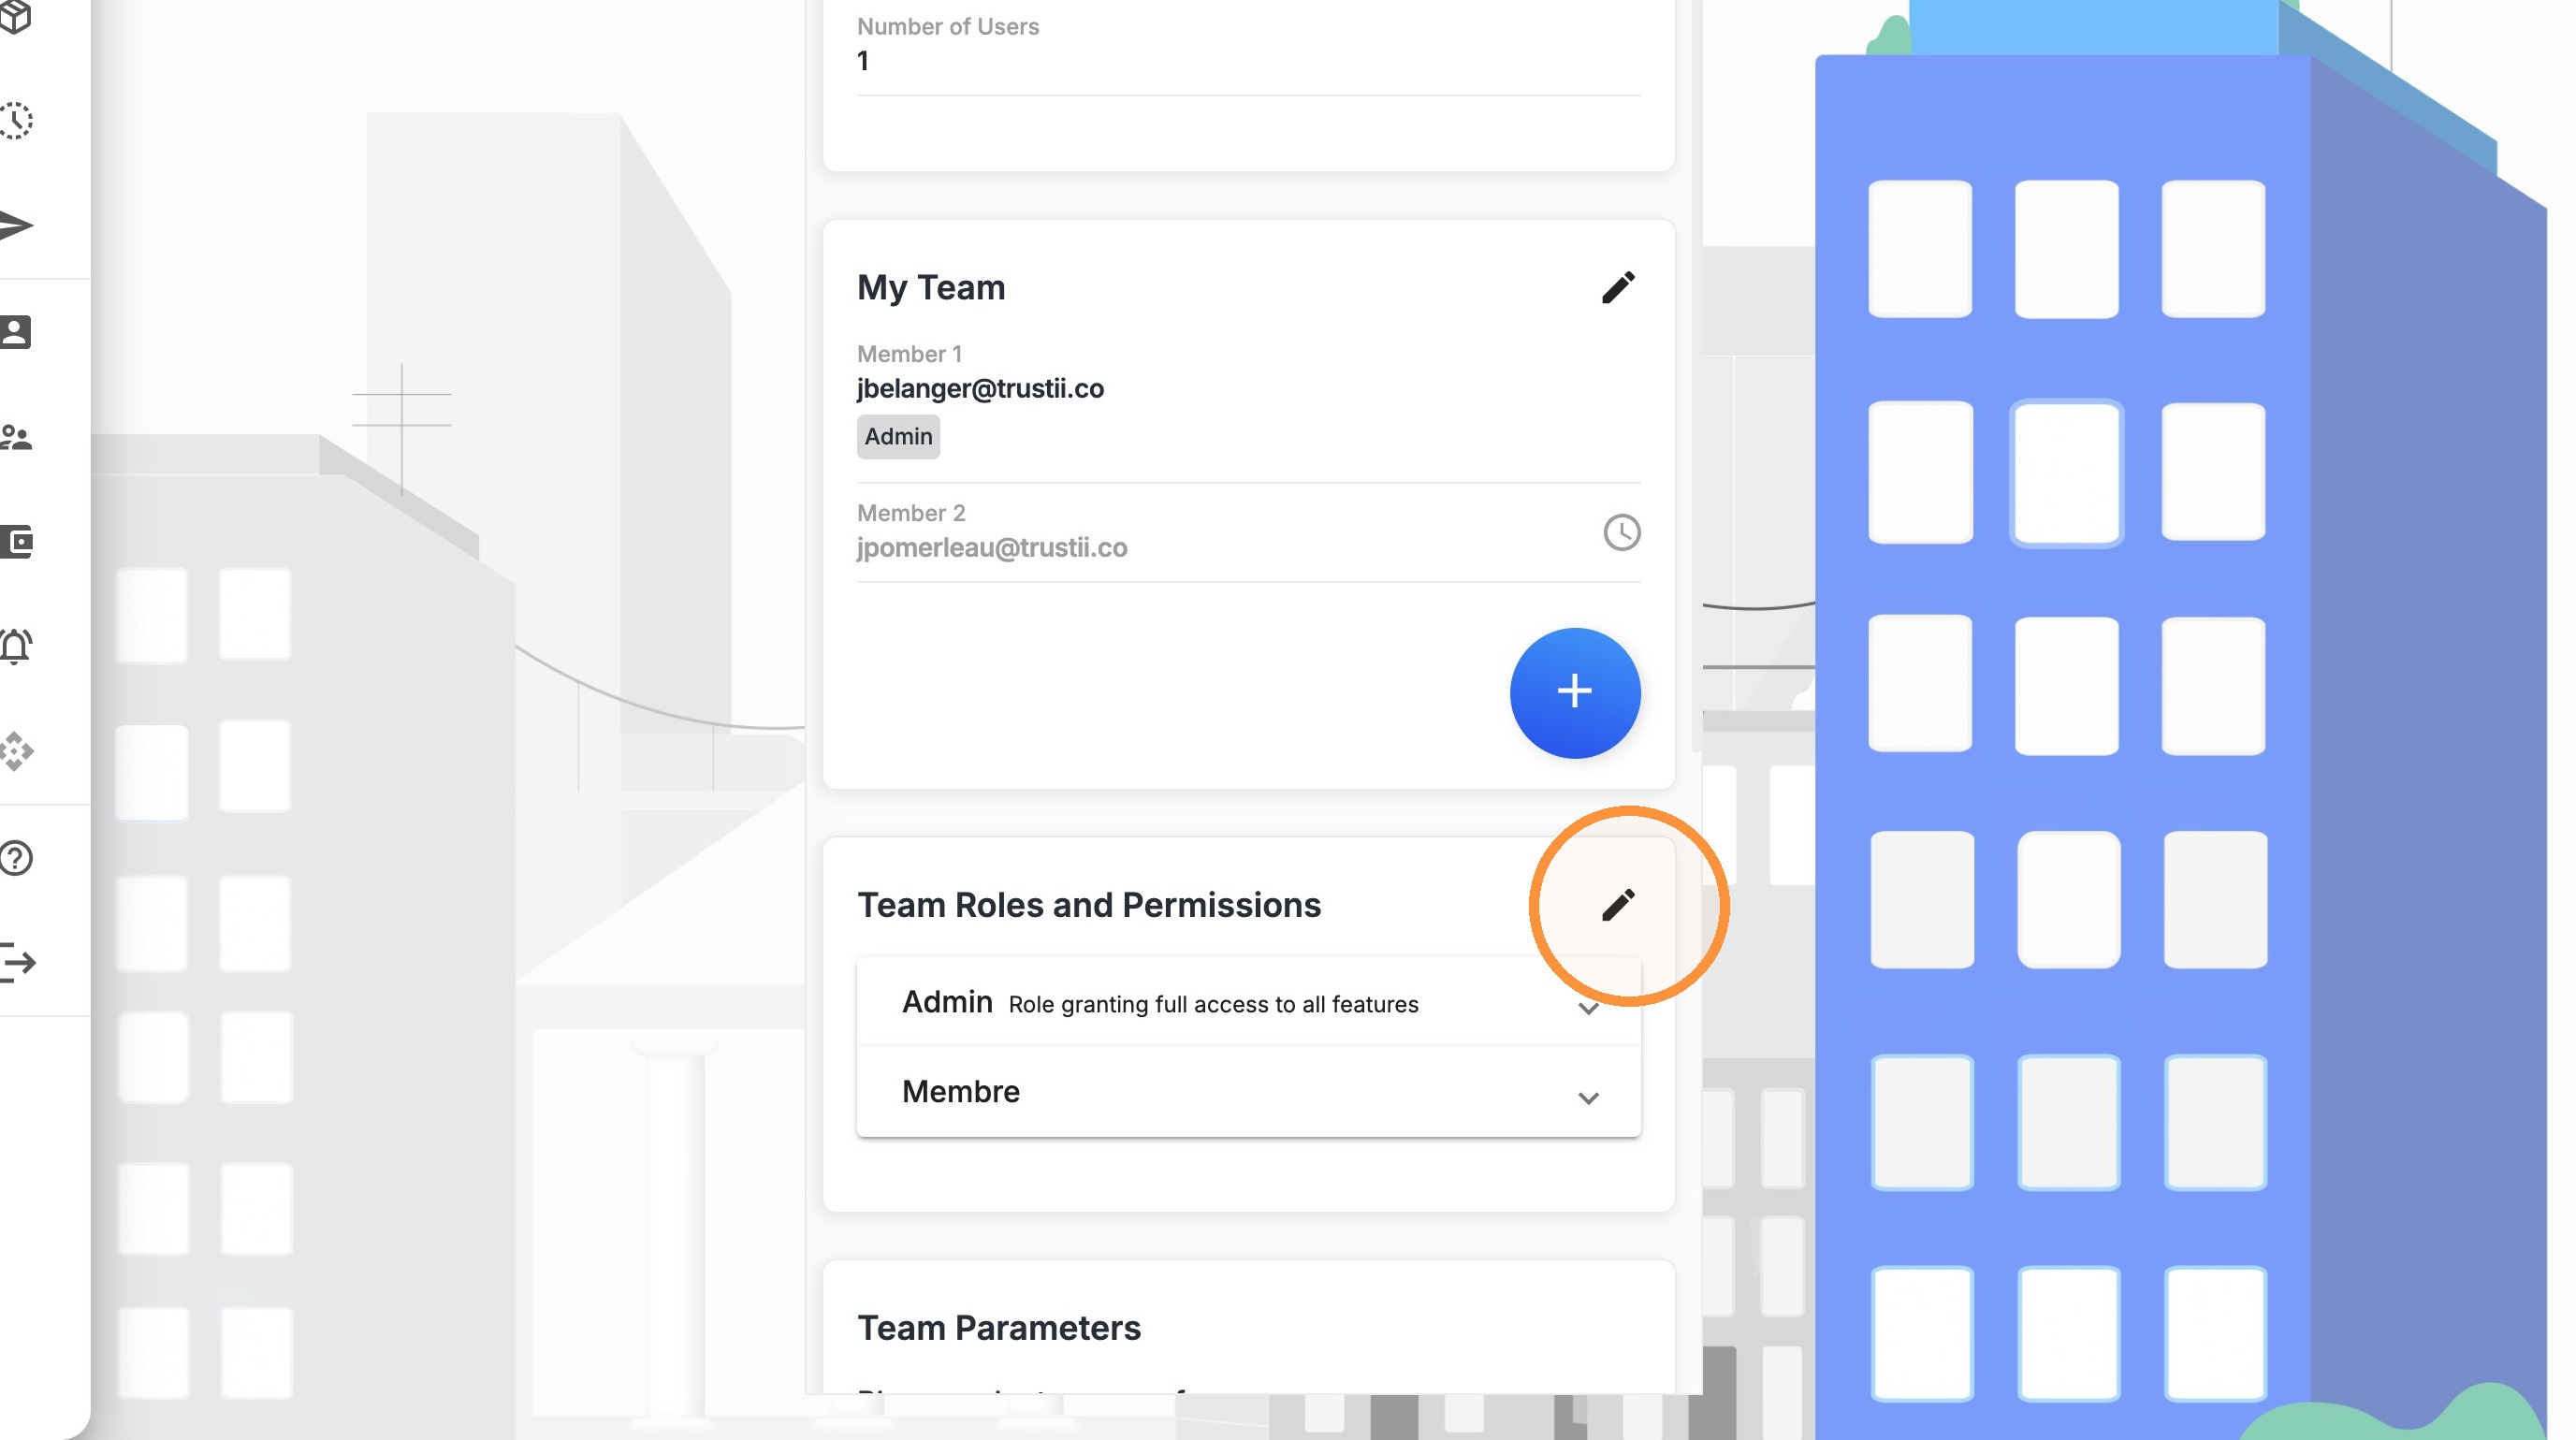
2. Scroll down to Team Roles and Permissions and click the pencil icon.
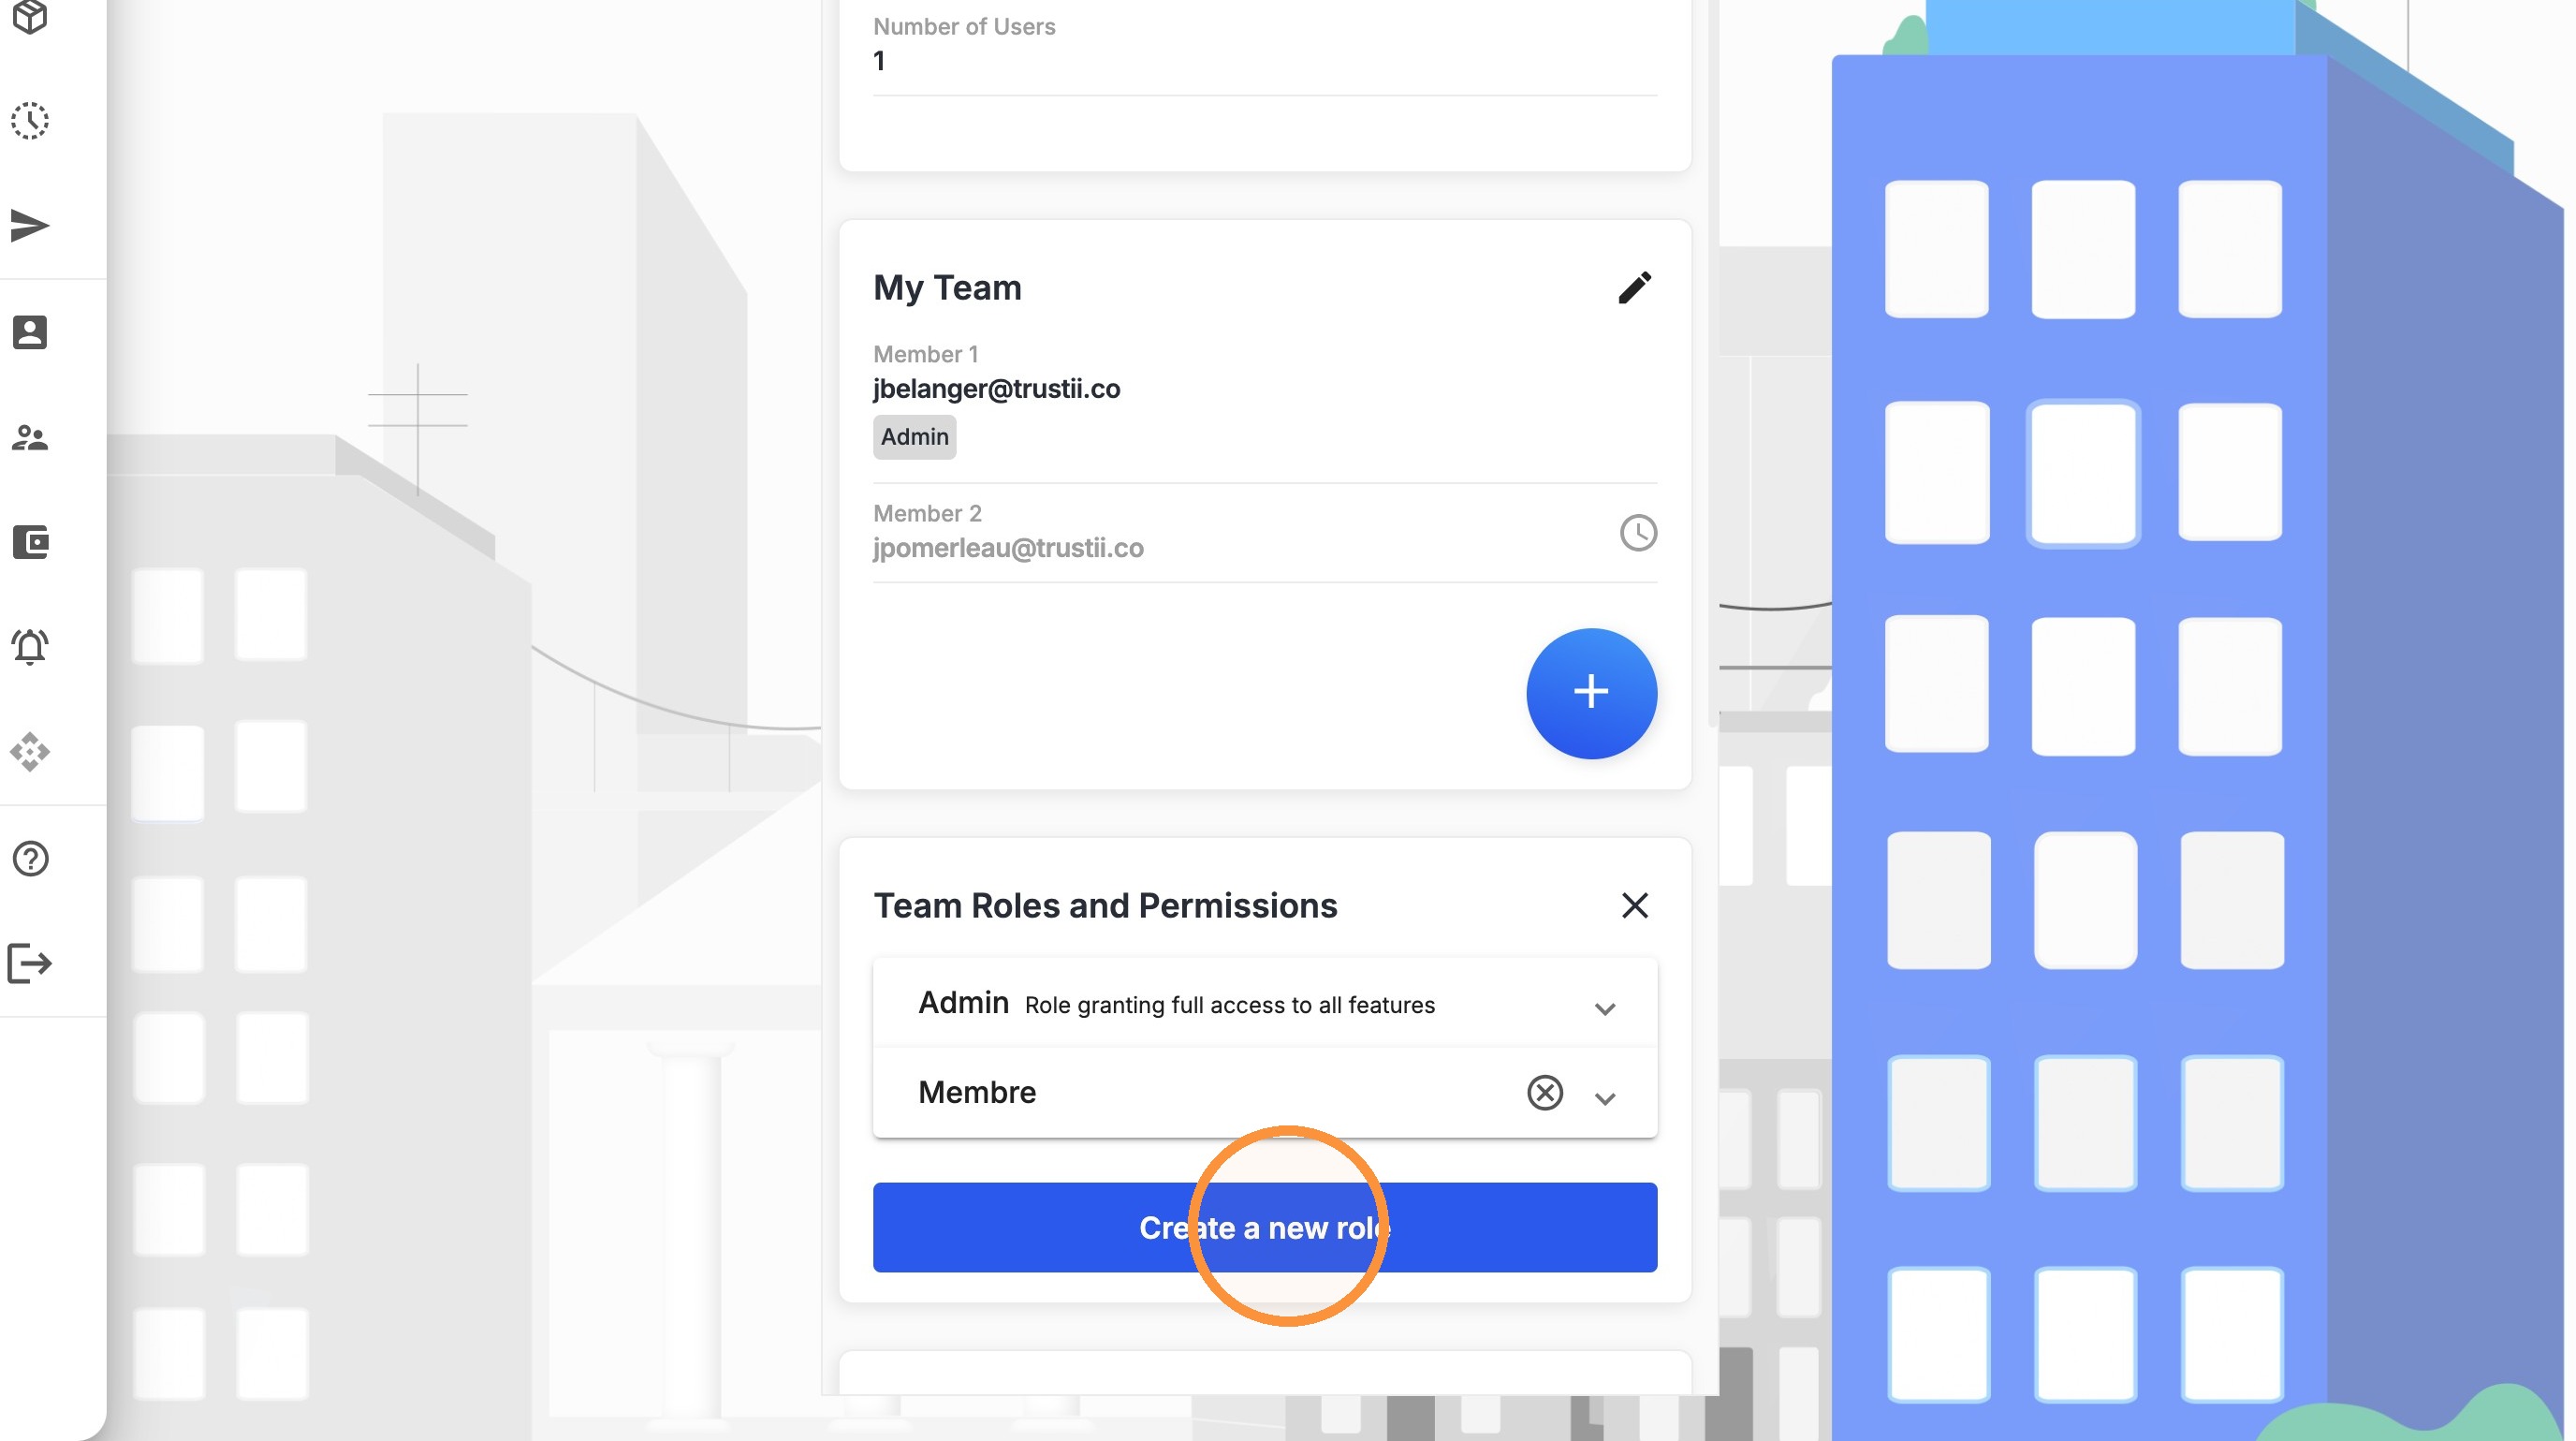
2. Click Create a new role.
3. Enter the name and description of the role, then click Create role.
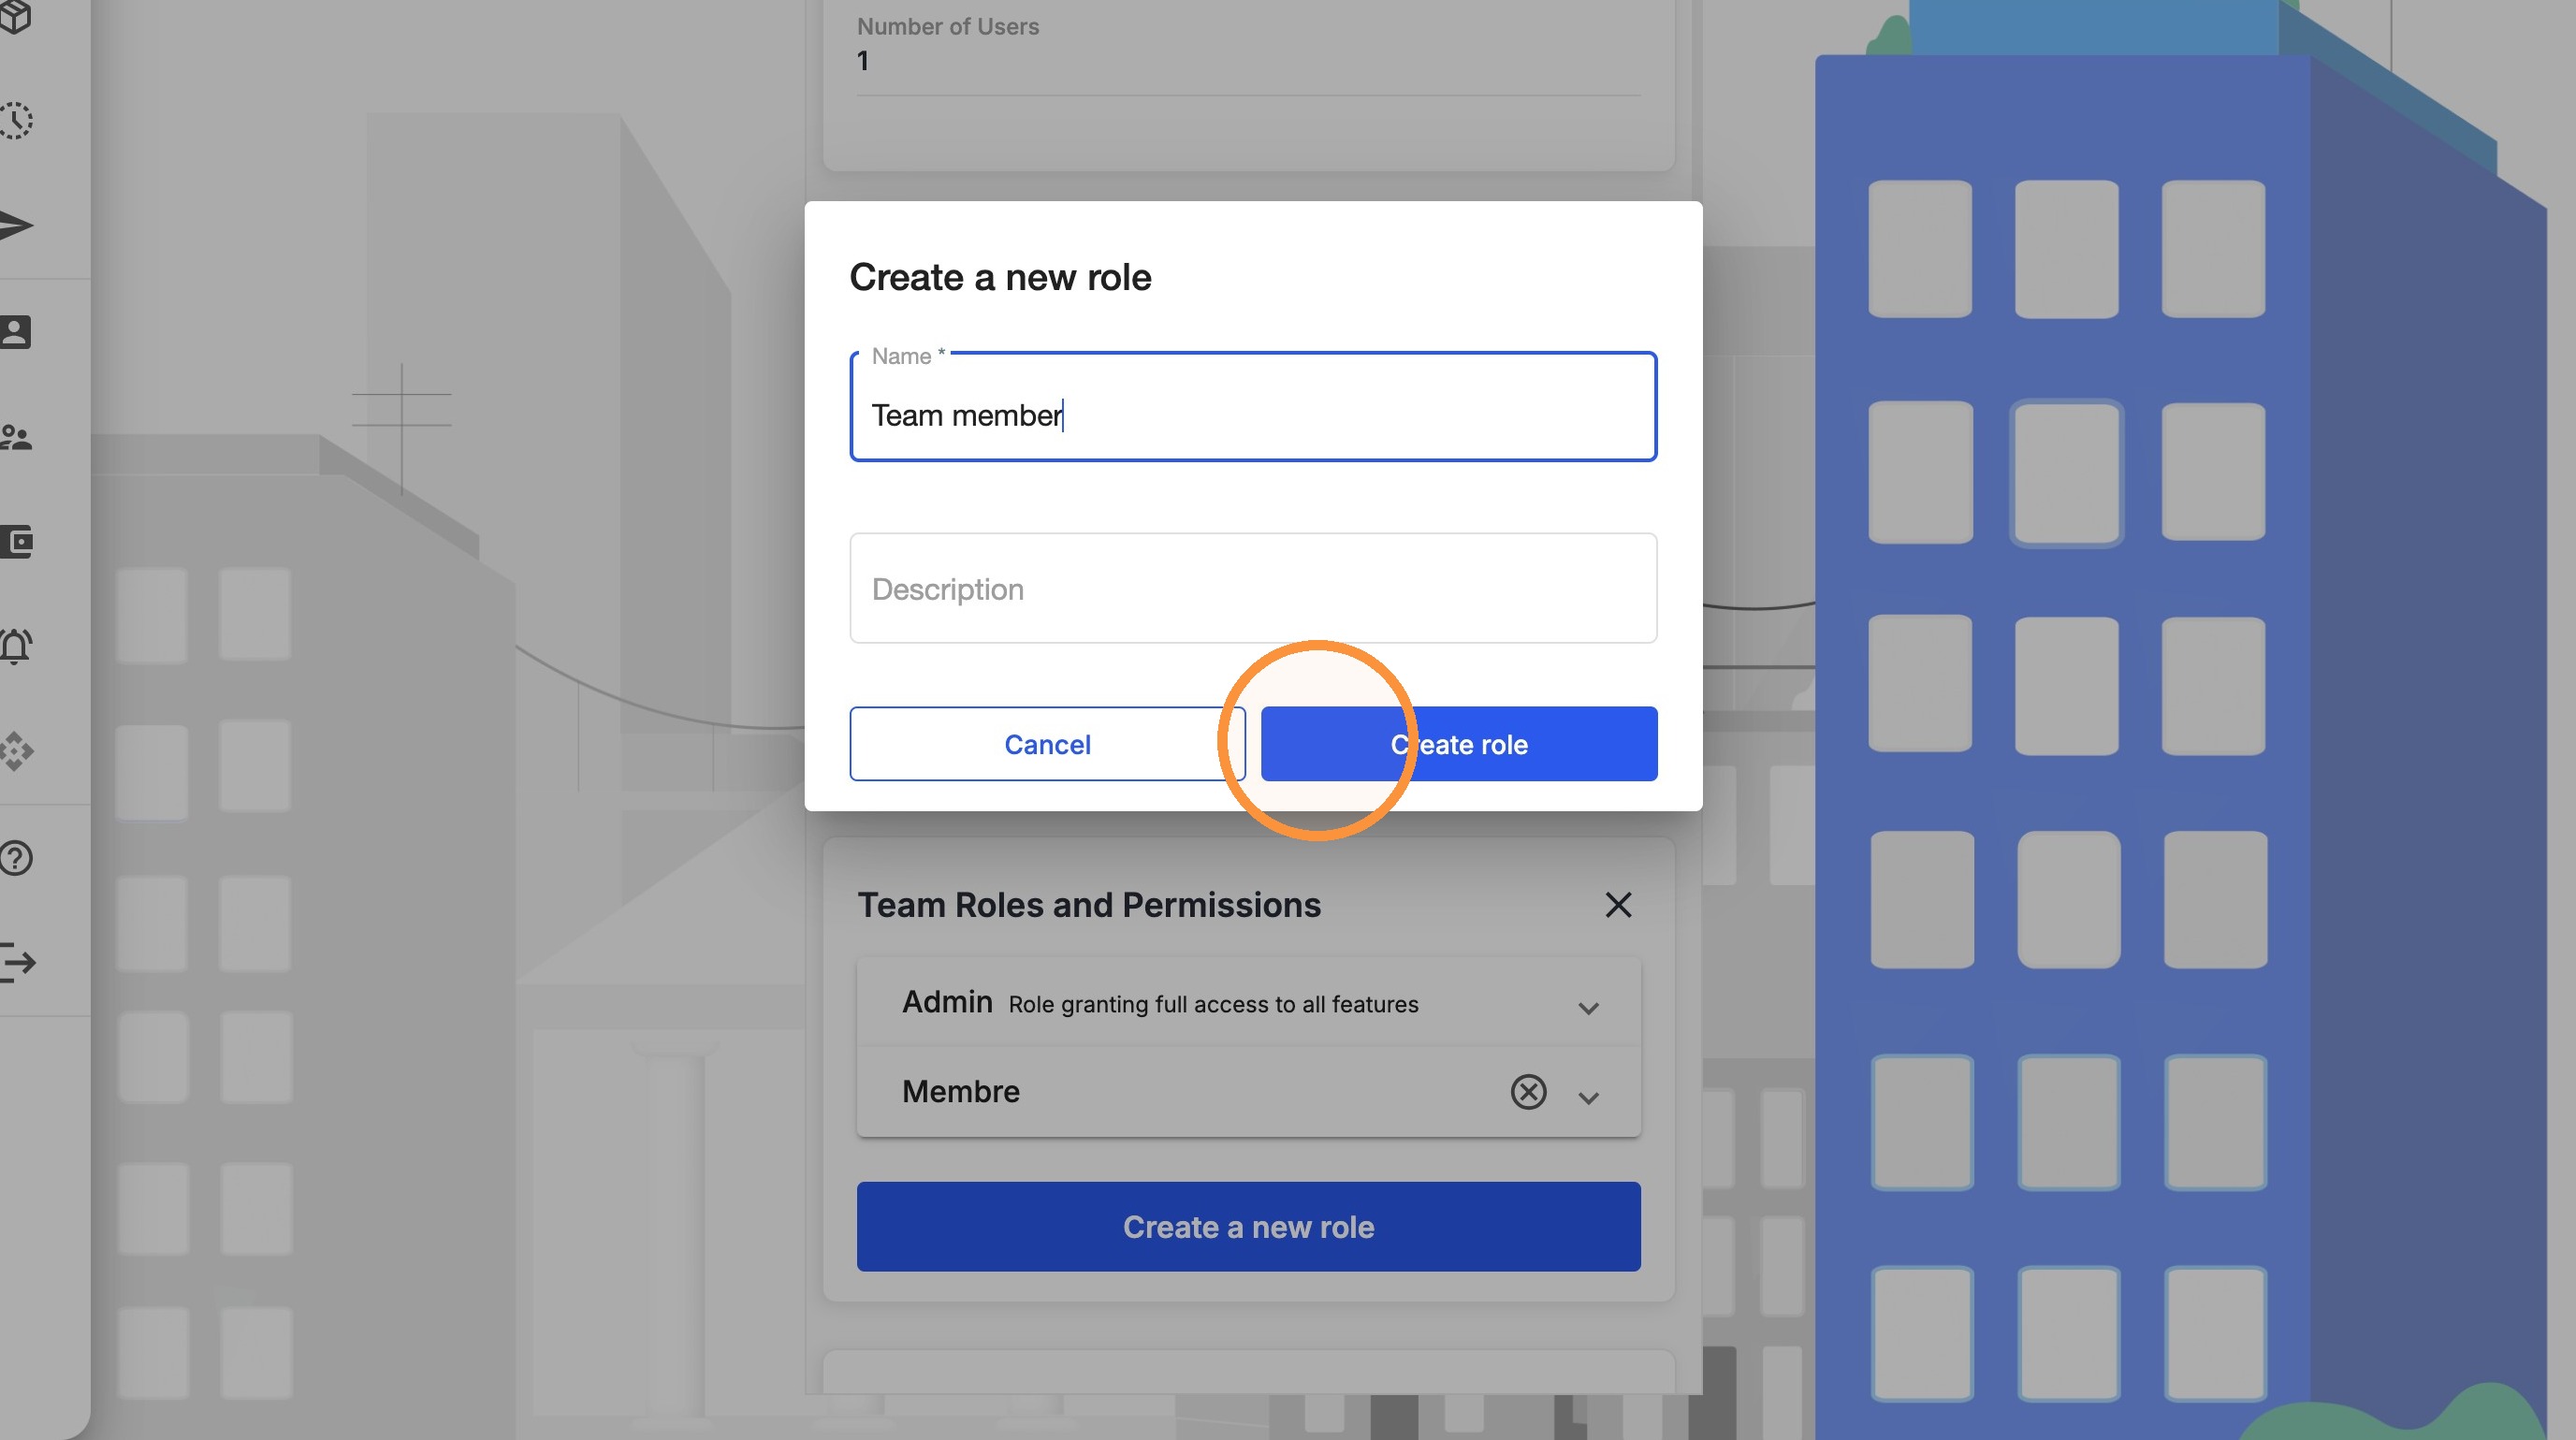
New roles are created with no permissions enabled. Follow the steps below to choose what the role can do.
Set or modify a role's permissions
Follow these steps to choose permissions for a new role or change them for an existing one.
1. From the left-hand menu, click My Team.
2. Scroll down to Team Roles and Permissions and click the pencil icon.
3. Click the role to open its permissions.
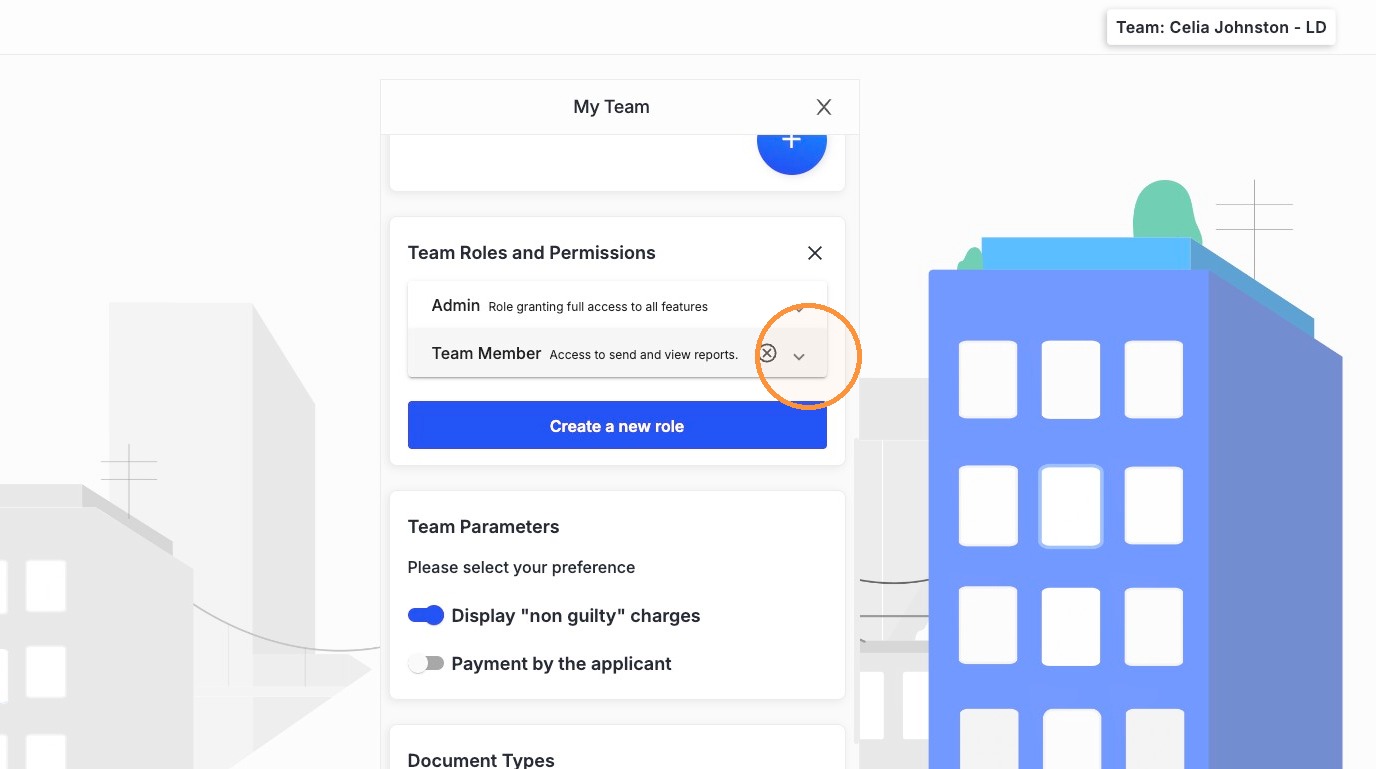
4. Click a category to expand it.
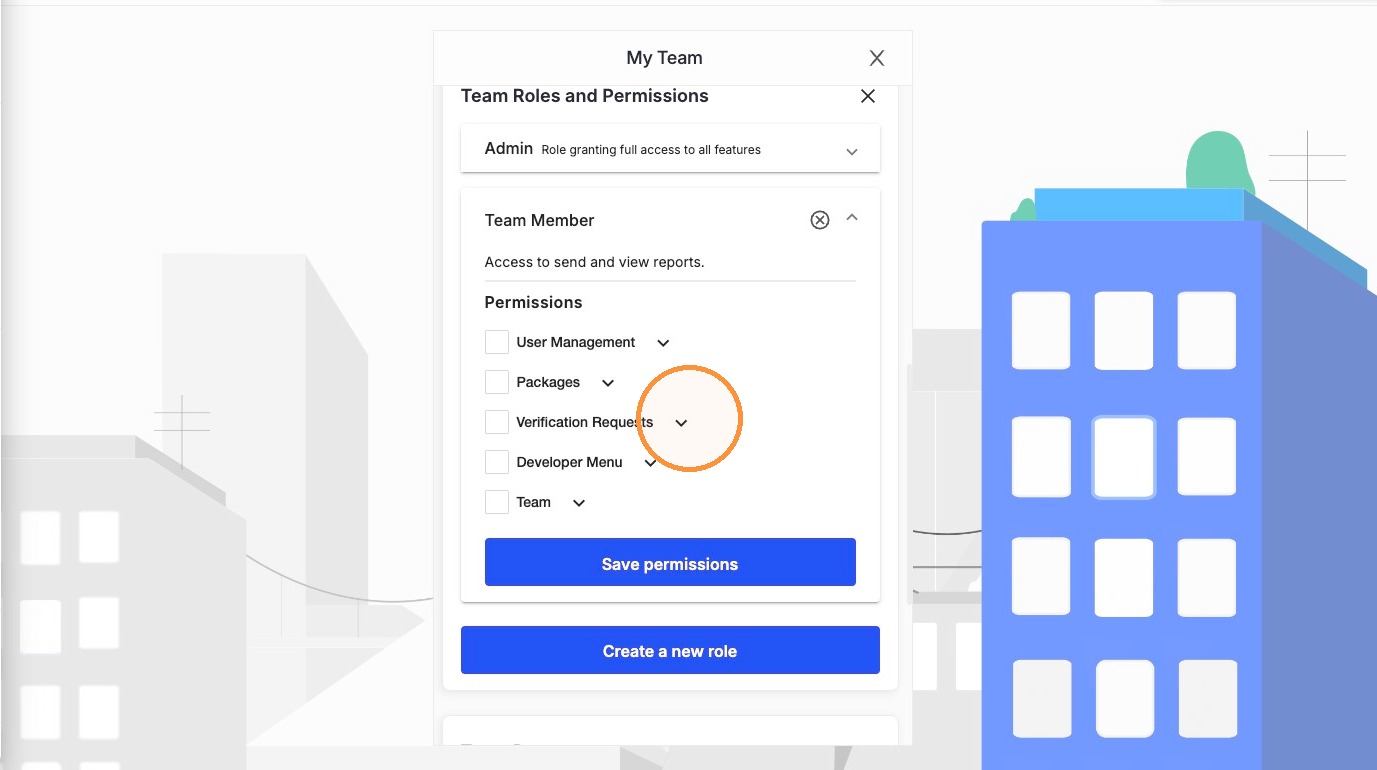
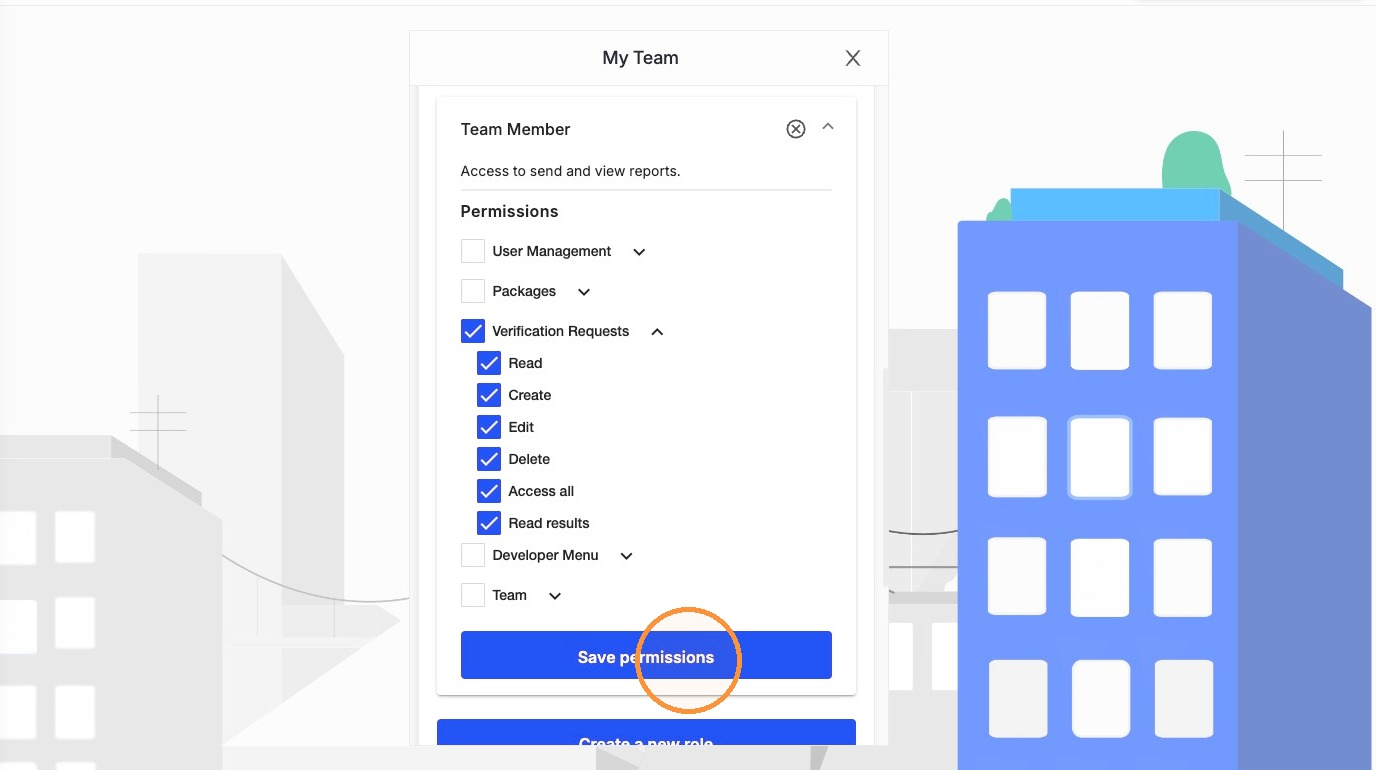
5. Select the checkbox next to each permission you want to enable. To enable every permission in a category, select the checkbox next to the category name.
6. Click Save permissions.
Was this article helpful?
That’s Great!
Thank you for your feedback
Sorry! We couldn't be helpful
Thank you for your feedback
Feedback sent
We appreciate your effort and will try to fix the article